Trunking Recorder Installation with Unitrunker
- Install and configure Unitrunker with at least 1 working "Voice" following receiver.
- Ensure the "Voice" following receiver audio is plugged into the "line-in" input of a sound card or routed using Virtual Audio Cable to a virtual sound card.
- Install Trunking Recorder.
- Trunking Recorder will try to install the required Remote.dll in Unitrunker v1 automatically. If your Unitrunker data folder is not in the default location you will have to manually install the Remote.dll. See "Unitrunker Remote.dll Installation" instructions below.
- Start Trunking Recorder.
- Setup a voice recorder for every Voice following receiver/VCO setup in Unitrunker. Each receiver in Unitrunker v1 MUST have a unique "Model" value. If you have multiple Realtek or AirSpy receivers the "Model" value in Unitrunker will need to be edited. If you have a receiver with multiple VCOs you will need to enter the VCO number. (If using Unitrunker v2 each VFO will need a unique "Label" set and the VCO number should be set to 0)
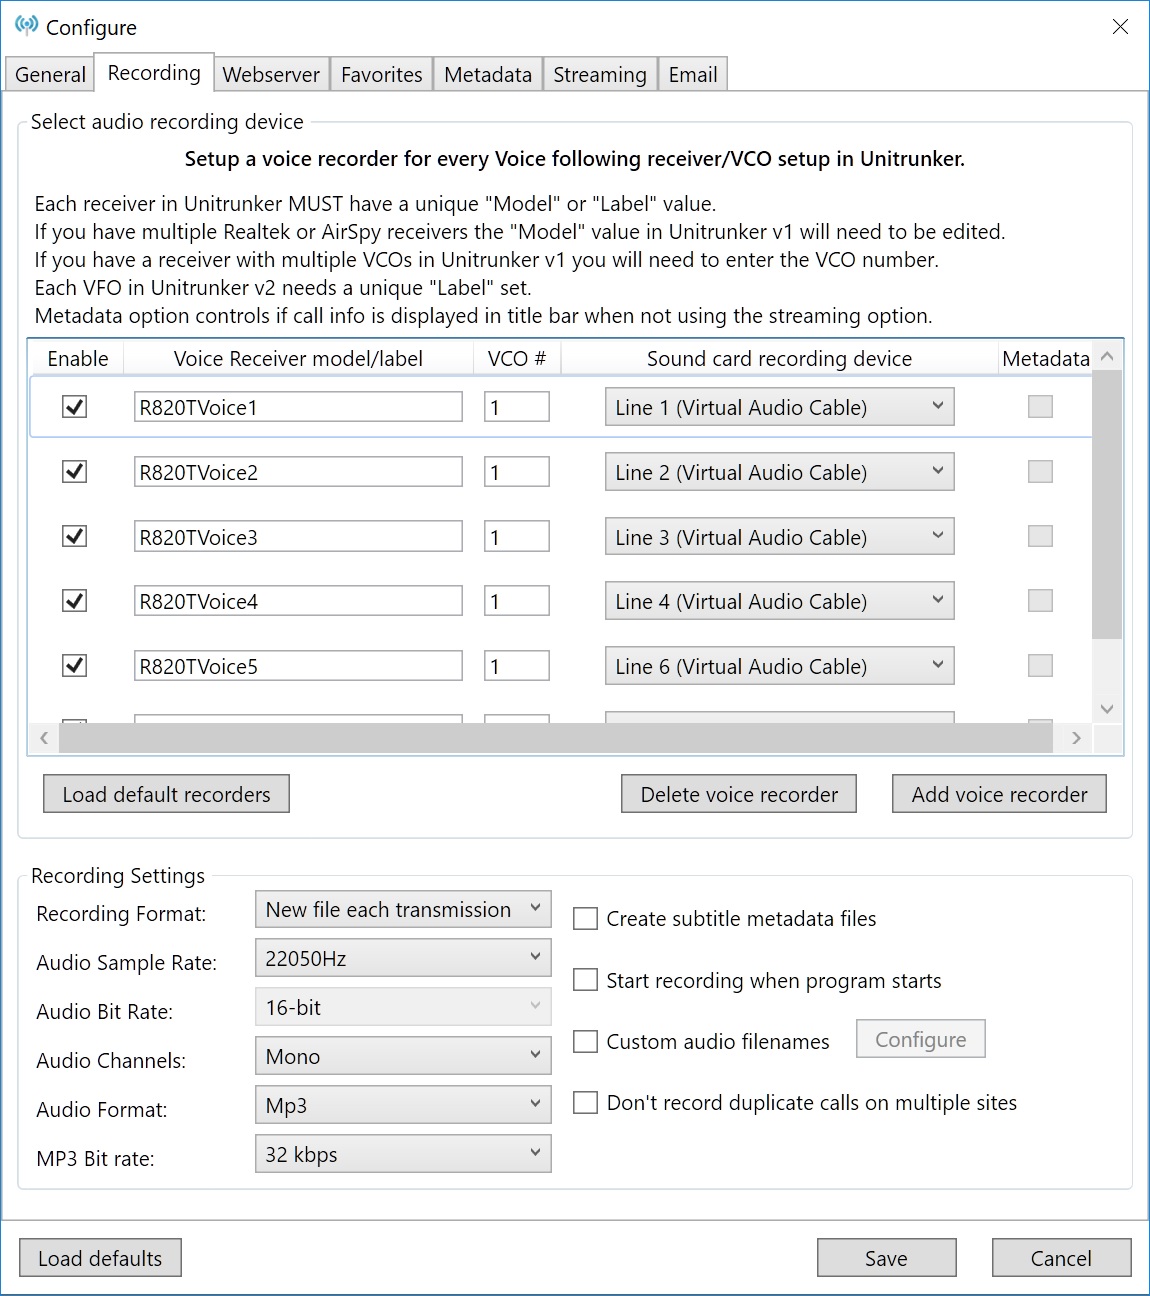
- For each receiver select the sound card that the audio for that receiver can be heard on. Trunking recorder will listen to this sound card and record the audio. If you use a program to decode digital audio such as DSD you should select the audio output of this program and not the digital audio output set in Unitrunker.
- If you are using Unitrunker v2 and the built-in digital decoding you point Trunking Recorder to the "Analog" sound card output setup in Unitrunker v2.
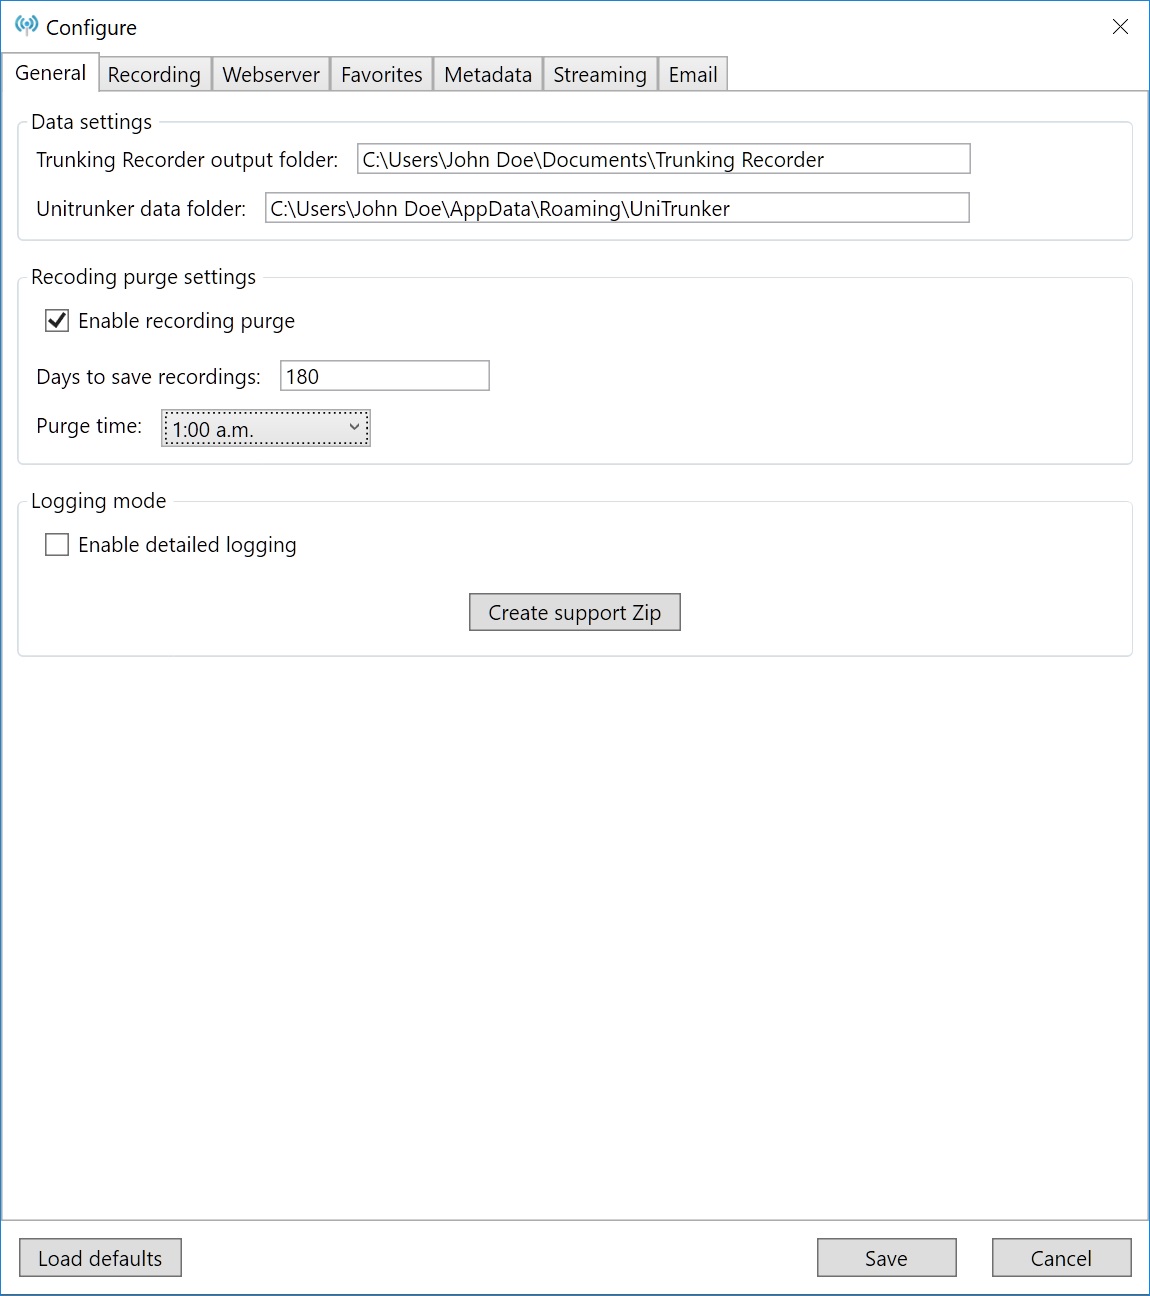
- If you have your Unitrunker v1 data folder in a different location you will need to specify that location on the General tab of the Configure menu.
Trunking Recorder Installation with SDRTrunk
- Install and configure SDRTrunk.
- For each "Talkgroup" you want recorded setup an "Alias" with the "Record Audio" option.
- Set the "System" value in SDRTrunk to the System ID of the radio system. You can also include a System label value by appending it after the ID using a space. Example: "796 Michigan's Public Safety Communications System (MPSCS)"
- Set the "Site" value in SDRTrunk to the Site ID of the radio system. You can also include a Site label value by appending it after the ID using a space. Example: "003-090 Kent County Simulcast"
- Install Trunking Recorder.
- Start Trunking Recorder.
- In the Configure menu check the "Enable SDRTRunk call recordings import" CheckBox on the "Call Import" tab.
- Set the SDRTrunk "recordings" folder path.

Trunking Recorder Installation with ProScan
Trunking Recorder supports importing calls recorded by ProScan, these can be Trunked Systems or conventional frequencies. Trunking Recorder can import calls from multiple instances of ProScan if they all share a common base recording directory.
Manual Unitrunker Remote.dll Installation for Unitrunker v1
- Download UniLogger 1.5
-
Extract the "Remote.dll" and copy it to the folder that contains the "Unitrunker.xml" (Normally it's "%APPDATA%\UniTrunker")
Note: The "Remote.dll" is required no matter if you are using a physical scanner or sdrsharp as a voice receiver -
Verify that the "sdrsharptrunking.log" file is created and being updated in the same folder as the "Remote.dll".
Note: If the log file is not found verify you have setup the "Voice" receiver in Unitrunker. - If you have manually installed another "Remote.dll" in one of the Unitrunker folders you should remove it to prevent conflicts.