Trunking Recorder Installation with ProScan
Trunking Recorder supports importing calls recorded by ProScan, these can be Trunked Systems or conventional frequencies. Trunking Recorder can import calls from multiple instances of ProScan if they all share a common base recording directory.
Limitations
- Only supports MP3 format and not WAV format.
- ProScan tag mappings are hardcoded and cannot be changed in Trunking Recorder.
- ProScan "Site" value for Trunked System calls will be used as "SystemID" in Trunking Recorder for Uniden DMA scanners.
- Only tested with Uniden SDS200, BCD536HP, and BCD996XT scanners. (It should work with any scanner supported by ProScan)
- Any ProScan recorded calls that are corrupt or missing MP3 ID3v2 MetaData will not be imported.
- To have ProScan display and record User ID MetaData you may need to ensure your scanner has the "Display Unit ID" option enabled.
- If ProScan misses the Unit ID (Source ID) at the start of the call it will not be written to the MP3 ID3v2 MetaData and will be blank in Trunking Recorder.
- All calls are treated as "Group" calls in Trunking Recorder.
To enable Trunking Recorder to import ProScan recordings
- Install and setup "ProScan" so it's able to connect to your scanner and you have programmed/downloaded all the frequencies you wish to record.
- Click the "Options" menu item at the top of the ProScan window.
- Click the "Recorder" tab.
- Set the "Delete < Seconds From Grid And File" to "Off" so ProScan doesn't delete short recordings.
- Remove any text currently entered in the "Custom Recording Folders" box about half way down.
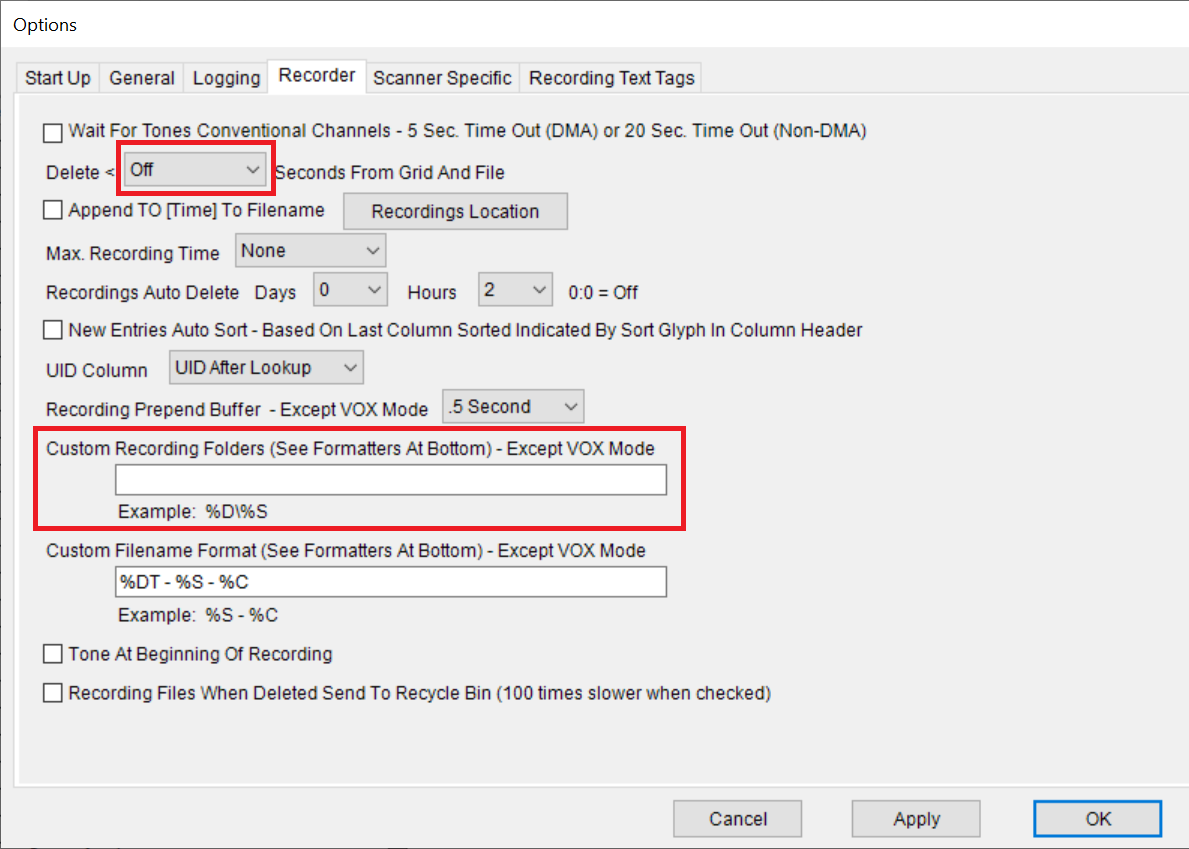
- If you plan to install multiple ProScan copies for different scanners they should each share a common base folder location for their recordings Example: "C:\Recordings\". Each copy of ProScan should have a dedicated folder inside the common base folder. Example: "C:\Recodings\Scanner1\" Click the "Recordings Location" button and choose the unique path for this ProScan copy.
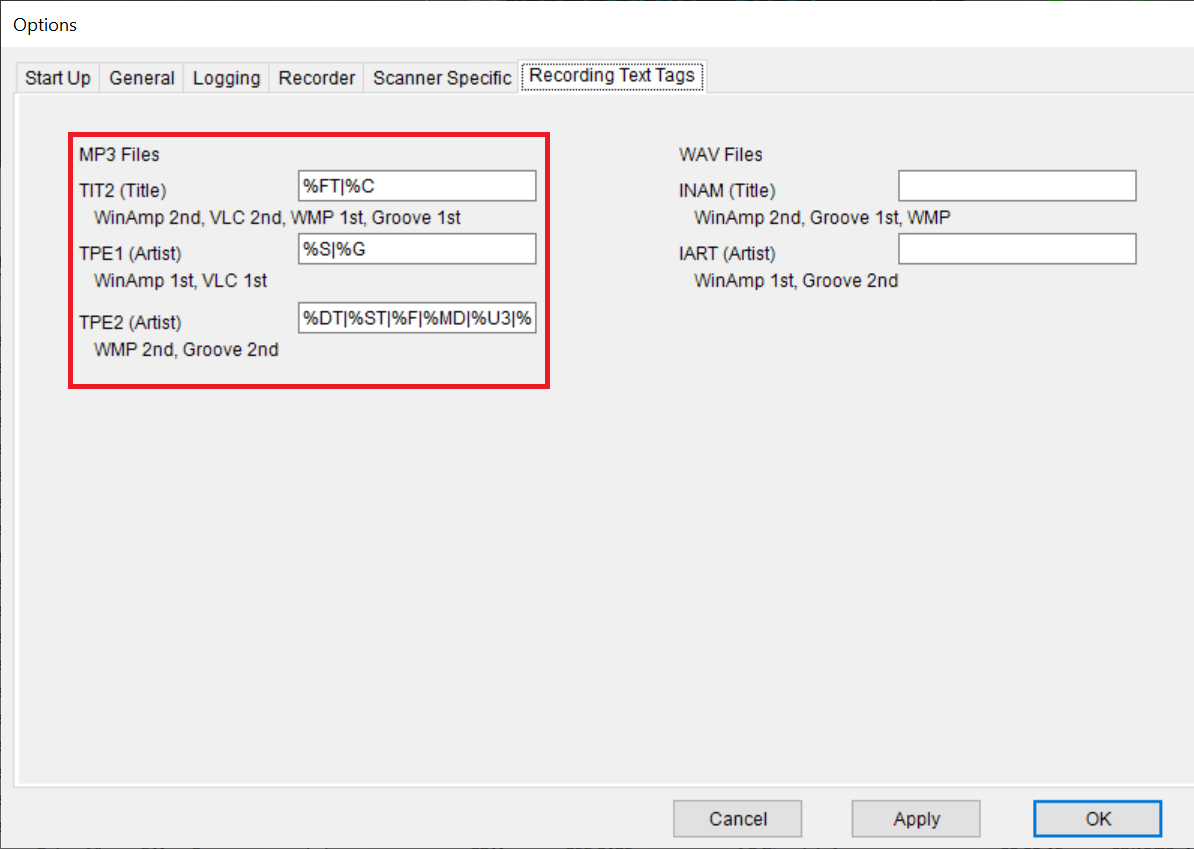
- Click the "Recording Text Tags" tab.
- Set the "TIT2 (Title)" box to "%FT|%C" (Do not include the double quotes).
- Set the "TPE1 (Artist)" box to "%S|%G" (Do not include the double quotes).
- Set the "TPE2 (Artist)" box to "%DT|%ST|%F|%MD|%U3|%U2|%U1|%SI" (Do not include the double quotes).
- Click the "OK" button
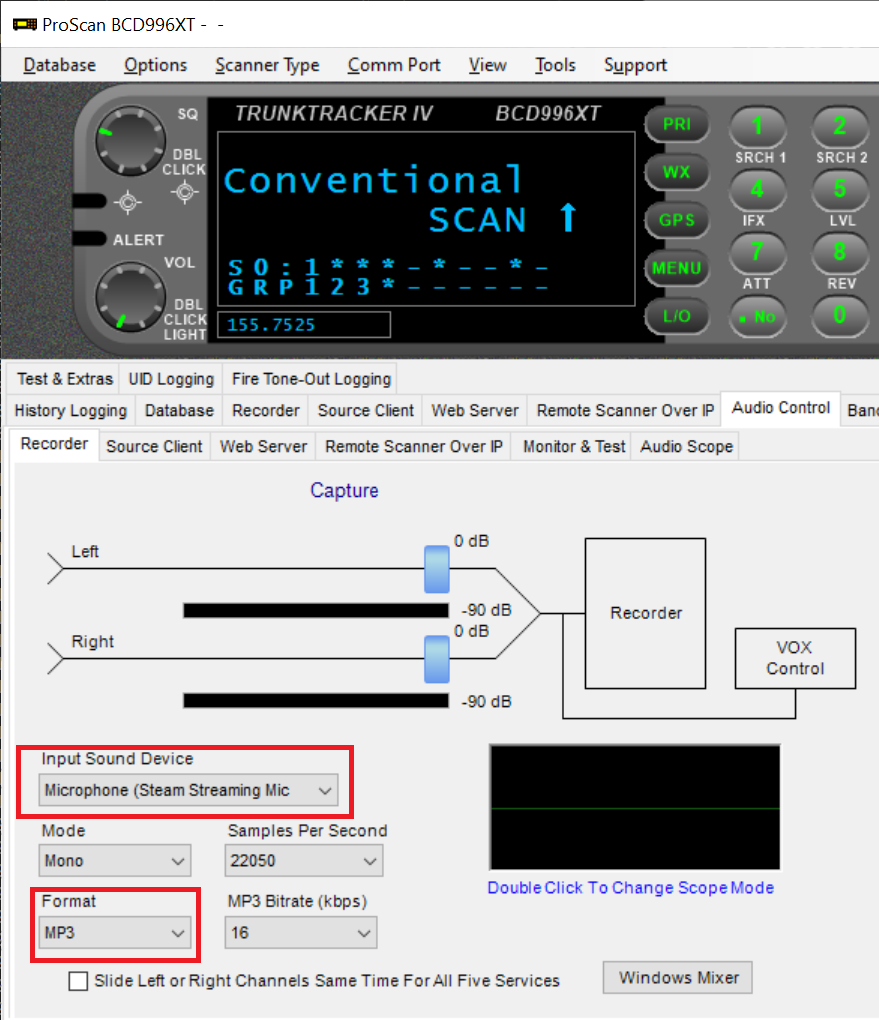
- Click the "Audio Control" tab on the main ProScan window.
- Select the correct sound card device that you have connected to your scanner in the "Input Sound Device" dropdown.
- Make sure the "Format" dropdown has the "MP3" option selected.
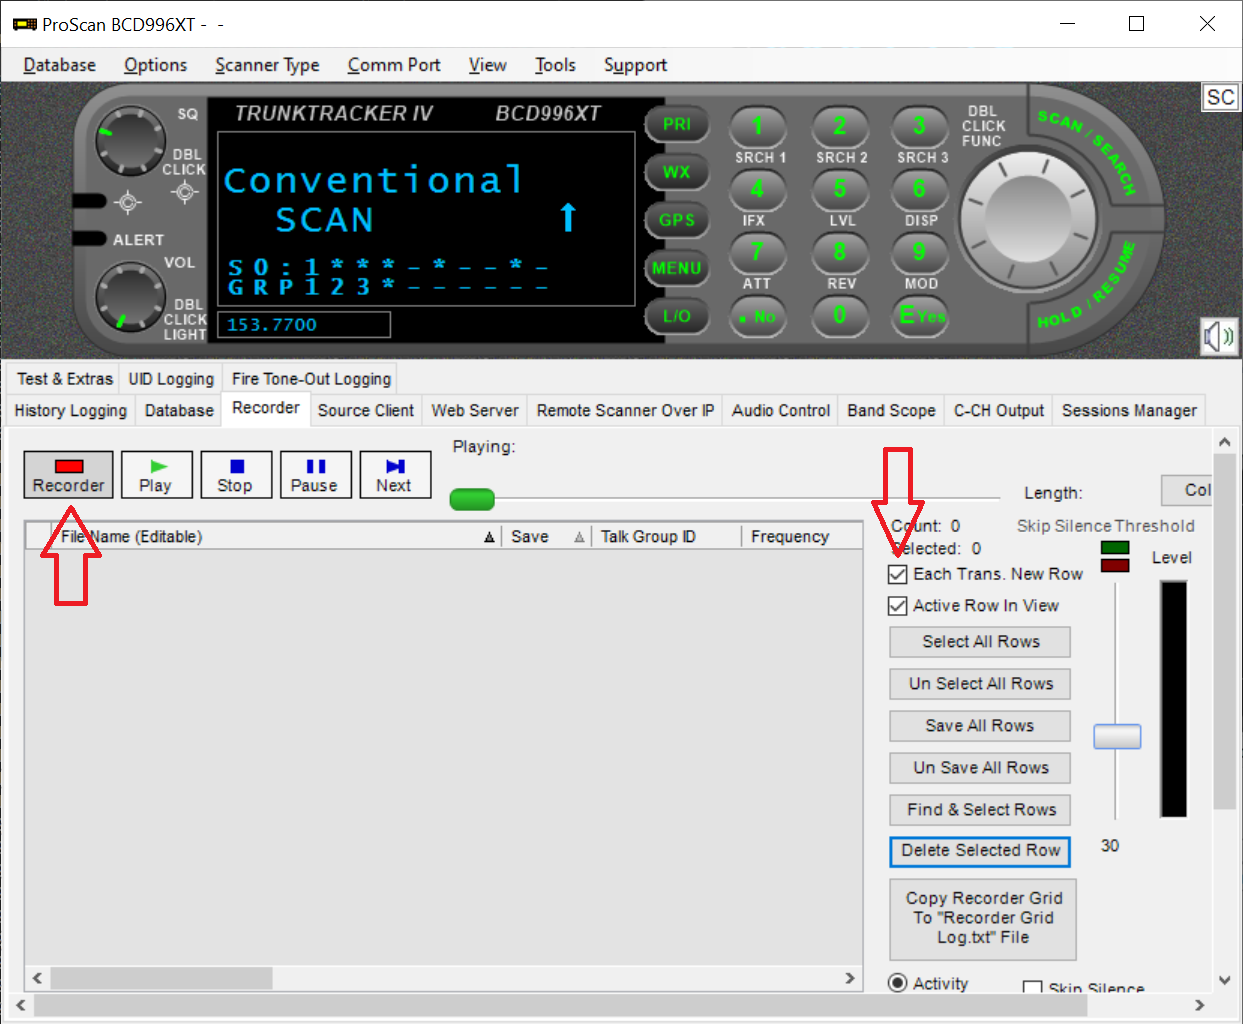
- Click the "Recorder" tab on the main ProScan window.
- Check the "Each Trans. New Row" checkbox on the right side of the main ProScan window.
- Click the "Recorder" button on the left side of the main ProScan window. (The square box above the word should turn bright RED)
- ProScan should now record each call captured by your scanner.
- Install Trunking Recorder.
- Start Trunking Recorder.
- Click the "File" menu item at the top of the Trunking Recorder window and then select the "Configure" option.
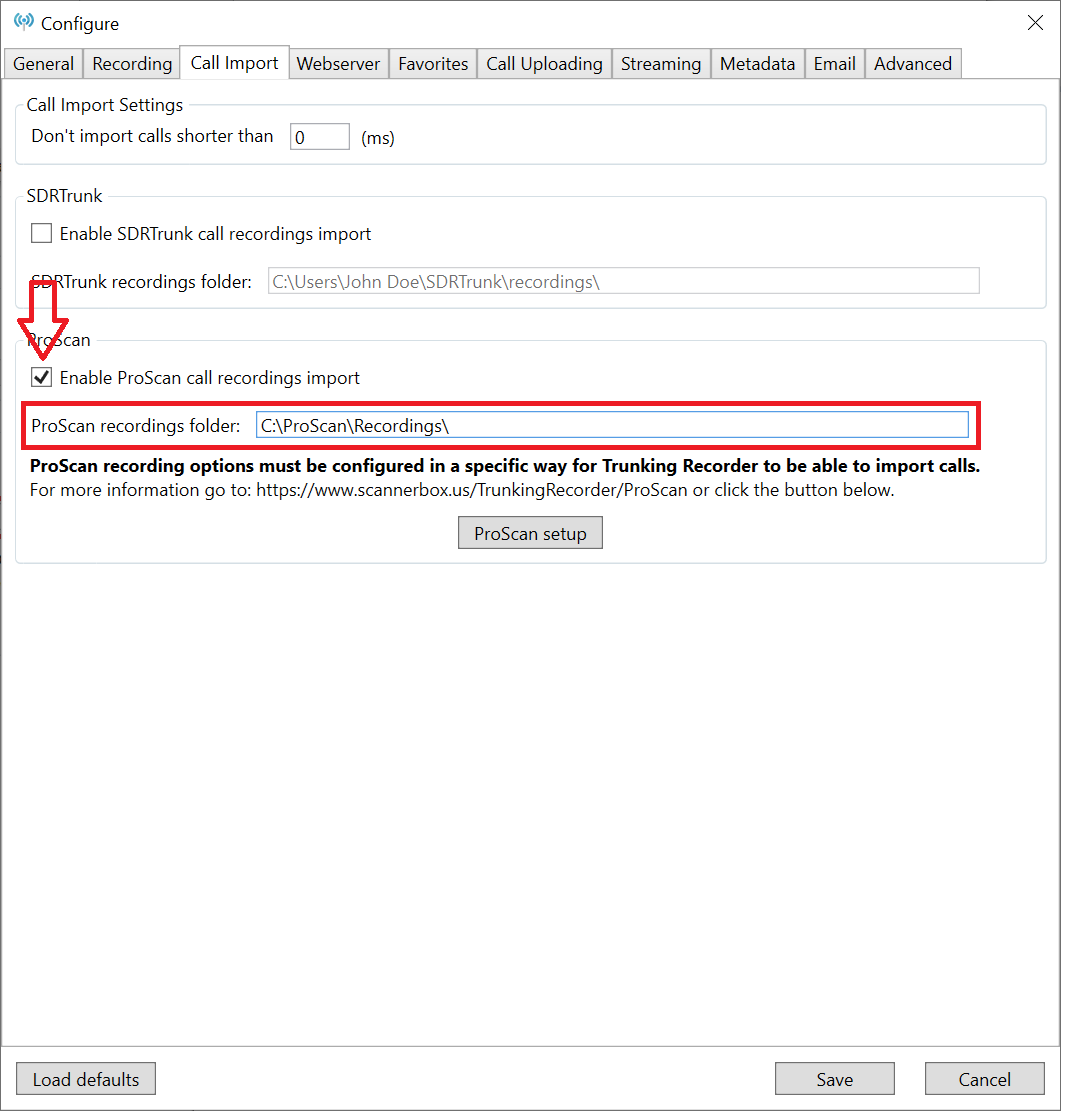
- Click the "Call Import" tab.
- Check the "Enable ProScan call recordings import" checkbox.
- Set the ProScan "recordings" folder path. (Default is "C:\ProScan\Recordings\", if you have installed ProScan to a different folder or changed the "Recording Location" in ProScan you must update this setting in Trunking Recorder) If you have multiple copies of ProScan you would enter in the common base recordings folder Example: "C:\Recordings\". Trunking Recorder will automatically find the subfolders and import the recorded calls.
- Click the "Save" button.
- Click the "Start Recording" button if not automatically started.